
A Homeowners Guide to Smart Lighting and Dimmer Switches
Late August is when Lehigh Valley homeowners start noticing the change first in the evenings, because the sun now drops behind the ridge line well before dinner is cleaned up, and the rooms that felt bright all summer suddenly need help at six o’clock. That shift is the reason smart lighting and dimmer switches become one of the most requested upgrades of the fall season, right alongside back to school schedules and earlier bedtimes for kids. A good smart lighting system does more than let you tap a phone screen; it lets you set the brightness of a kitchen to full output for homework and cooking, then drop the same fixtures down to a soft level an hour later without touching a single bulb. Dimmer switches also cut energy use and extend lamp life when they are matched correctly to the fixtures they control, which is where most do it yourself installations run into trouble. The catch is that modern smart switches and dimmers make real demands on the wiring inside your walls, and a 1962 ranch in Whitehall does not always have what a 2026 device expects to find in the box. This guide walks through how these devices actually work, what goes wrong when the wiring or the bulbs are mismatched, and how to plan an upgrade that still works properly five winters from now. Edinson Electrical Solutions installs these systems across Northampton and Lehigh counties every week, and the same handful of issues come up again and again. Understanding them before you buy hardware will save you money, frustration, and a second service call.
How Smart Lighting and Dimmer Switches Work in a Modern Home
A smart switch is a small computer that happens to control a line voltage circuit, and that single fact explains almost everything about how it needs to be installed. Unlike a standard toggle switch, which simply opens and closes the hot conductor, a smart device has to stay powered at all times so it can listen for commands from an app, a hub, a voice assistant, or a scheduled routine. Staying powered requires a complete circuit, which means the device needs both a source of power and a return path, and that return path is the neutral conductor. Dimmers add a second layer of complexity because they do not just switch power on and off; they chop the alternating current waveform many times per second to reduce the effective voltage delivered to the lamp. How that chopping happens, and how the bulb or driver responds to it, determines the difference between a room that dims beautifully and one that flickers, buzzes, or refuses to turn on at low settings. Getting the pairing right between the switch, the wiring, and the light source is the entire job.
The Wiring Behind Smart Lighting and Dimmer Switches
The single most common obstacle in older Lehigh Valley homes is the missing neutral conductor at the switch box, and it is worth understanding why so many houses were built this way. For decades, electricians commonly ran power to the ceiling fixture first and then dropped a two conductor cable down to the switch, creating what the trade calls a switch loop. In that arrangement, both conductors in the switch box are part of the hot side of the circuit, and there is no white grounded conductor available to complete a path back to the panel. A traditional toggle switch does not care, because it only needs to interrupt the hot leg. A smart switch usually does care, because its radio, processor, and status light draw a small but constant current. The National Electrical Code addressed this starting with the 2011 edition, when section 404.2(C) began requiring a grounded conductor at most switch locations serving lighting outlets in dwellings, which is why homes built or rewired in the last fifteen years are far easier to upgrade.
Box fill is the second issue, and it is one that trips up plenty of weekend installers who assume a switch is a switch. Smart dimmers are physically deeper and bulkier than the devices they replace, and many of them carry pigtail leads instead of screw terminals, which adds conductor volume inside an already crowded enclosure. The Code sets specific volume allowances in section 314.16 based on conductor size, device count, clamps, and grounding conductors, and a shallow metal box from the 1950s often has no room left once a modern dimmer goes in. Forcing a device into a box that is too small crushes the conductors, stresses the terminations, and creates heat where you least want it. In many cases the correct fix is replacing the enclosure with a deeper old work box, which is straightforward for an electrician but awkward for a homeowner working through a finished wall. Equipment grounding is equally important, since nearly all dimmers require a ground connection for their internal filtering and for safe operation of any metal yoke or faceplate hardware. Homes with older cloth covered wiring, ungrounded circuits, or aluminum branch circuit conductors need special attention and specific device ratings before anything smart goes on the wall.
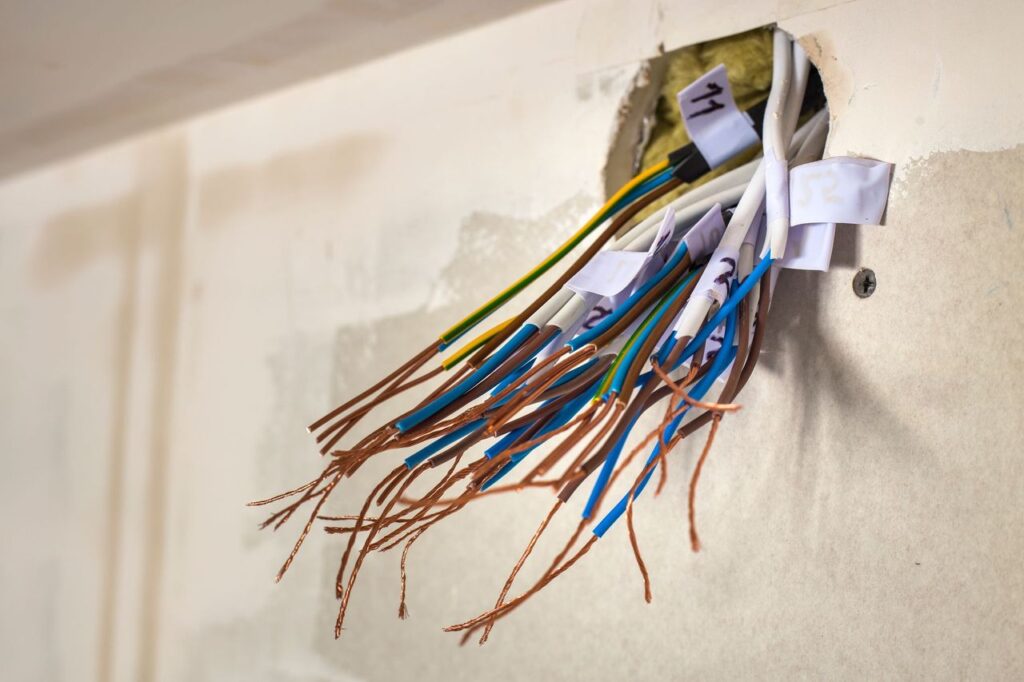
Identifying which conductor is which is where careful work separates a safe installation from a hazardous one. Line and load must be positively confirmed with a meter rather than guessed from wire color, because decades of remodels have left plenty of boxes with white conductors used as hot legs and red conductors used as switch legs. Traveler conductors in multi location circuits complicate this further, and connecting a traveler to a line terminal on a smart dimmer can destroy the device instantly. Any concealed splice, backstabbed connection, or brittle insulation discovered during the work needs to be corrected while the box is open, not left for later. Permits and inspections apply to new circuits and significant alterations in most Lehigh Valley municipalities, and skipping that step can create problems at resale. If your switch boxes lack neutrals or your home still runs on original branch circuit wiring, we can evaluate and correct it properly. Need your home rewired or your switch legs corrected? Click here for our electrical wiring service.
Choosing Bulbs That Match Your Smart Lighting and Dimmer Switches
Not every LED lamp is dimmable, and the ones that are do not all dim the same way, which surprises homeowners who expect modern bulbs to behave like the incandescents they replaced. An incandescent lamp is a simple resistive load, so reducing voltage reduces brightness in a smooth and predictable curve. An LED lamp contains a small driver circuit that converts line voltage into the low voltage direct current the diodes need, and that driver has to be specifically designed to interpret a chopped waveform as a brightness command. Cheap dimmable LEDs use minimal driver circuitry, which is why they often drop out abruptly at the low end of the range or glow faintly when the switch is fully off. Reputable manufacturers publish compatibility lists showing which of their lamps have been tested with which dimmer models, and those lists are genuinely useful rather than marketing filler. Buying the bulbs and the dimmer as a tested pair eliminates the majority of performance complaints before they ever start.
Load type matters just as much as lamp quality, and this is where the technical vocabulary becomes practical. Forward phase dimmers, sometimes called leading edge or TRIAC dimmers, were designed for incandescent and magnetic low voltage loads and remain common in existing homes. Reverse phase dimmers, also called trailing edge or electronic low voltage dimmers, generally produce smoother results with LED drivers and low voltage tape lighting because of how they handle the capacitive nature of those loads. Minimum load is another specification worth checking, since some older dimmers need a certain wattage present on the circuit to operate stably, and three LED downlights totaling twenty watts can fall below that threshold. Undercabinet tape lighting and landscape fixtures add another variable because they run through transformers or drivers that have their own dimming protocols, including 0 to 10 volt control on many commercial grade products. Matching the control method to the fixture is not optional; it is the difference between a system that works and a pile of returned parts.
Color quality deserves attention while you are already choosing lamps, because you will live with that decision far longer than you will think about the switch itself. Color temperature is measured in Kelvin, and most Lehigh Valley homeowners prefer roughly 2700K in living rooms and bedrooms for a warm residential feel, with 3000K working well in kitchens and 4000K reserved for garages, basements, and workshops. Color rendering index describes how accurately a light source shows the true colors of skin, wood, and fabric, and lamps rated 90 or above make a noticeable difference in kitchens and bathrooms. Some smart systems offer tunable white, letting you shift color temperature through the day, while certain premium LEDs offer dim to warm behavior that mimics the amber shift of an incandescent as it dims. There is also a fundamental choice between smart bulbs and smart switches, and the distinction is practical rather than philosophical. Smart bulbs lose all functionality when someone flips the wall switch off, which causes constant household friction, while smart switches keep control at the wall where everyone expects it. For a whole home approach, switches almost always win, and our team can lay out fixture and control selections room by room. Planning new fixtures or a lighting redesign? Click here for our interior lighting installation service.
Smart Lighting and Dimmer Switch Controls for Three Way and Four Way Circuits
Hallways, stairwells, and rooms with two entrances almost always use multi location switching, and these circuits require a different approach when smart devices enter the picture. In a conventional three way arrangement, two switches share a pair of traveler conductors, and the position of both devices together determines the state of the light. Smart dimmers rarely work that way, because the primary device needs to remain continuously powered and needs to manage the dimming function by itself. Most manufacturers solve this with a companion device, often called an accessory or remote dimmer, which sends a low level signal back to the main unit rather than switching line voltage directly. The wiring in the second box changes as a result, and one of the existing travelers frequently gets repurposed as a communication conductor. Doing this correctly requires understanding what is actually in the wall, not just following a generic diagram printed on the box.
Brand compatibility is stricter here than anywhere else in smart lighting, and mixing manufacturers in a multi location circuit almost never works. A companion dimmer from one brand will not communicate with a main dimmer from another, even when the two devices look nearly identical and use the same terminal labeling. Some newer systems avoid the wiring problem entirely by using battery powered wireless remotes that mount over the old switch location and communicate by radio, which is a practical solution when the existing box has no usable neutral or spare conductor. That approach also opens up placement flexibility, since a wireless remote can go on a wall that was never wired for a switch at all. The tradeoff is battery replacement every several years and dependence on radio range inside a house with plaster, lath, and metal boxes. Choosing between a wired companion and a wireless remote should be based on what the existing circuit provides, and that requires opening boxes and testing.
Four way circuits, where three or more locations control the same lighting group, magnify every one of these considerations. The intermediate device in a conventional four way arrangement swaps the traveler pair, and there is no direct smart equivalent that simply drops into that position. Converting these circuits usually means designating one location as the powered main dimmer and converting the others to companions or remotes, which sometimes involves reconfiguring conductors inside multiple boxes. Careful labeling during the work prevents a great deal of confusion later, and photographing each box before disconnecting anything is standard practice for our technicians. Testing every control location before closing up the walls is equally important, because a companion that was wired to the wrong terminal will pass a casual check and fail two weeks later. Multi location smart dimming works reliably when it is planned as a system rather than assembled one device at a time.
Common Problems With Smart Lighting and Dimmer Switches
Most calls we receive about smart lighting are not about the technology failing outright; they are about performance that is technically functional but genuinely annoying to live with. A dimmer that hums faintly at fifty percent, a bank of recessed lights that shimmers during the last few percent of travel, or a switch that drops off the network every time the router restarts all fall into this category. Some of these symptoms trace back to mismatched components, which are fixable by swapping hardware. Others point to conditions in the branch circuit or the service entrance that deserve real investigation, because flickering can occasionally signal a loose connection rather than a bulb preference. Knowing which category a symptom belongs to determines what you should do next. The sections below cover the three failure patterns we see most often in Lehigh Valley homes.
Flickering and Buzzing From Smart Lighting and Dimmer Switches
Flicker at the bottom of the dimming range is the most frequent complaint, and it usually comes from an incompatible pairing between the dimmer and the lamp driver. When a forward phase dimmer chops the waveform aggressively at low output, an inexpensive LED driver may not receive enough consistent energy to maintain a steady arc of current through the diodes. The visible result is a rapid pulsing that some people notice immediately and others only see out of the corner of their eye. Setting a low end trim, a calibration feature built into most quality dimmers, raises the minimum output just enough to stabilize the lamps without meaningfully reducing dimming range. Swapping to a reverse phase dimmer often solves what trim adjustment cannot, particularly on circuits with low total wattage. In a room with only a few LED lamps, simply adding a fourth or fifth fixture to the same circuit sometimes brings the load above the minimum threshold and clears the problem entirely.
Audible buzzing comes from two different places, and identifying the source narrows the repair considerably. Buzz coming from the fixture itself is typically the lamp driver or filament vibrating in response to the chopped waveform, and it is most common with inexpensive retrofit lamps and magnetic low voltage transformers. Buzz coming from the switch box is usually the dimmer’s own internal choke, a small filtering component that reduces electrical noise and can vibrate audibly under certain loads. A dimmer rated for the correct load type will always run quieter than one that is fighting the fixtures it controls. Some warmth at the faceplate is normal and expected on a loaded dimmer, since phase control produces heat as a byproduct. A device that is genuinely hot to the touch, discolored, or smells of overheated plastic should be shut off at the breaker and evaluated right away.
There is one flicker pattern that has nothing to do with dimmers, and every homeowner should know how to recognize it. Lights that flicker or dim across multiple rooms at once, especially when a large appliance cycles on, can indicate a loose neutral connection, a failing service conductor, a corroded lug in the panel, or a problem upstream at the utility connection. That symptom is not a compatibility issue and should never be dismissed as a bulb quirk, because a compromised neutral can put damaging voltage on sensitive electronics and create real fire risk. The same is true for lights that brighten unexpectedly, breakers that trip when a dimmer is adjusted, or switches that spark audibly. These conditions warrant immediate professional diagnosis with proper test equipment rather than trial and error at the hardware store. If your lights are behaving strangely beyond one room or one fixture, get it checked before you buy another bulb. Seeing flickering lights or switches that spark? Click here for our electrical repair service.
Load Limits and Heat Issues With Smart Lighting and Dimmer Switches
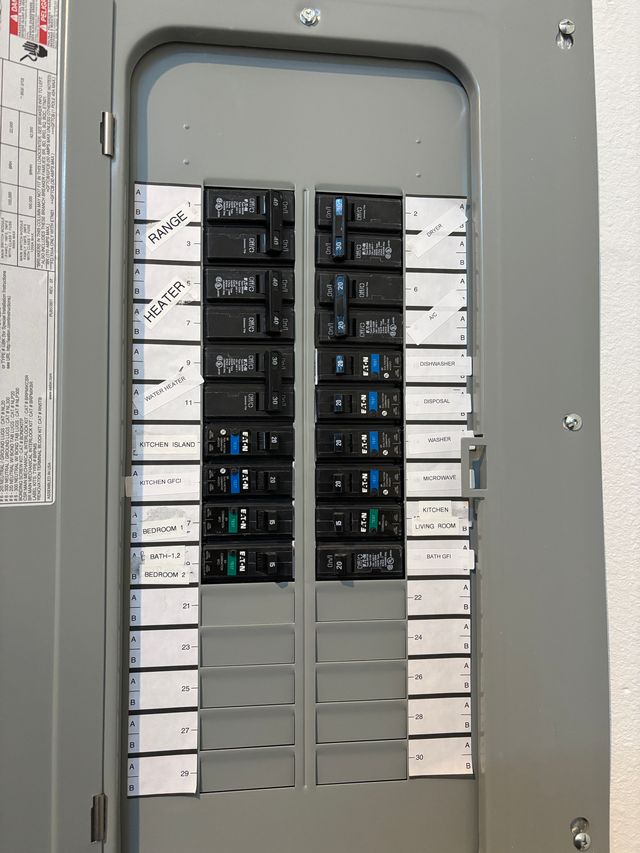
Every dimmer carries a maximum load rating, and reading that rating correctly requires more attention than most packaging suggests. A device labeled for 600 watts is describing incandescent capacity, and the same unit may be rated for only 150 watts of LED load, which sounds contradictory until you understand why. LED drivers present a capacitive and nonlinear load that stresses the dimmer’s internal switching components far more than a simple resistive filament does, so manufacturers publish separate and much lower LED ratings. Fortunately, LED lamps consume so little power that 150 watts still covers a large room; twelve recessed lights at ten watts each total only 120 watts. Problems appear when someone connects a long run of tape lighting, a chandelier with many lamps, or several rooms of fixtures to a single control point. Adding up actual connected wattage before selecting a dimmer takes two minutes and prevents premature device failure.
Ganging multiple dimmers in one enclosure introduces derating, a detail that is genuinely easy to overlook. Dimmers dissipate heat through metal fins on the sides of the yoke, and installing two or three units side by side means removing those fins to make room. Every manufacturer publishes a derating table showing the reduced capacity that applies once fins are removed, and the reduction can be substantial, sometimes cutting rated capacity by a third or more per device. Ignoring the table produces a bank of switches that runs hot, fails early, and can damage the enclosure over time. Adequate box volume and proper spacing become critical in these locations, particularly in kitchens and entryways where four and five gang boxes are common. Our technicians calculate this during layout rather than discovering it after the drywall is patched.
Certain loads should never be connected to a standard dimmer under any circumstances, and this rule protects both the equipment and the people using it. Ceiling fan motors require a fan speed control specifically listed for motor loads, because a lighting dimmer will overheat the motor windings, cause humming, and shorten the fan’s life dramatically. Bathroom exhaust fans, garbage disposals, and general purpose receptacles fall into the same prohibited category, since a dimmed receptacle invites someone to plug in equipment that cannot tolerate reduced voltage. Fixtures with integrated drivers marked as non dimmable will not respond correctly no matter what control is used, and forcing the issue damages the fixture. Reading the fixture label before selecting a control eliminates almost all of these mistakes. When a room combines fan and light control from one wall location, the correct solution is a dual function device or a paired set of properly rated controls.
Connectivity and Control Failures in Smart Lighting and Dimmer Switch Systems
Radio reliability is the most underestimated part of a smart lighting installation, and it deserves planning before hardware is purchased. Most WiFi based switches operate on the 2.4 gigahertz band, which travels through walls reasonably well but competes with a crowded field of other household devices. Metal enclosures, plaster and lath construction, stone chimneys, and foil faced insulation all attenuate that signal, and a switch buried in a metal box behind a refrigerator is fighting a difficult battle. Mesh protocols such as Zigbee and Z Wave handle large homes more gracefully because every powered device repeats the signal for its neighbors, which builds redundancy as the system grows. Hub based systems generally hold up better than cloud dependent ones in homes with marginal internet service, since local control keeps working when the connection drops. Deciding on a protocol early prevents the common outcome of three incompatible ecosystems living in the same house.
Software changes cause a surprising share of long term frustration with smart lighting. Firmware updates occasionally alter behavior, app redesigns move familiar controls, and manufacturers sometimes discontinue cloud services for older product lines. Choosing devices that retain full local control, meaning the wall switch and any programmed scenes continue functioning without an internet connection, insulates you from most of that risk. It is also worth confirming that every smart switch operates as a normal manual switch when the network is unavailable, which quality devices always do. Guests, house sitters, and family members who do not use the app should still be able to walk in and turn on a light. Building the system around that principle keeps it usable for everyone in the household rather than only the person who set it up.
Power quality affects smart lighting more than it affected the switches these devices replaced. Every smart dimmer contains sensitive electronics that can be damaged by voltage surges from utility switching, nearby lightning, or large motor loads inside the home cycling on and off. Late summer and early fall thunderstorms roll through the Lehigh Valley regularly, and a single surge event can take out multiple switches across a house at once. A layered approach, combining a whole house surge protective device at the panel with point of use protection for entertainment and networking equipment, is the standard defense. Documenting your device locations, network names, and hub settings also makes recovery far easier after any outage or reset. Protecting the investment you just made in smart lighting costs a fraction of replacing it. Want to protect your smart devices from storm surges? Click here for our whole house surge protection service.
Why You Need a Licensed Electrician for Smart Lighting and Dimmer Switch Installation
Smart lighting looks like a simple device swap, and that appearance is exactly what causes so many homeowners to end up calling us after the fact. The devices themselves are the easy part; the wiring conditions behind them are where experience matters. Missing neutrals, undersized boxes, ungrounded circuits, mislabeled conductors, and shared neutrals between circuits all require judgment and proper testing to resolve safely. A professional installation also means the finished system is code compliant, properly loaded, and documented, so the next person who opens a box understands what they are looking at. Edinson Electrical Solutions handles these upgrades throughout Allentown, Bethlehem, Easton, Whitehall, Emmaus, Nazareth, and the surrounding communities every season. Getting it done right the first time costs less than fixing it twice.
Safety Benefits of Professional Smart Lighting and Dimmer Switch Installation
Every smart lighting installation touches line voltage, and the consequences of a poor termination do not always show up immediately. Loose connections generate heat slowly over months, degrading insulation and creating conditions that lead to arcing inside a closed wall. Our technicians torque terminations to manufacturer specifications, verify grounding continuity, and confirm that box fill calculations are satisfied before any device goes back in place. We also identify and correct problems discovered along the way, including backstabbed receptacles, brittle insulation, and improper splices left behind by past remodels. That kind of attention is the difference between a decorative upgrade and a genuinely safer home.
Code compliance is not paperwork; it exists because specific failure modes have happened enough times to warrant a rule. Requirements covering grounded conductors at switch locations, arc fault protection on dwelling branch circuits, tamper resistant devices, and enclosure fill all address real hazards documented over decades. We install to current Pennsylvania adopted standards and coordinate permits and inspections where local jurisdictions require them. Homeowners planning to sell within a few years benefit directly, since unpermitted electrical work regularly surfaces during inspections and complicates closings. Doing the work correctly protects both your family and your property value.
Proper diagnosis also prevents you from spending money on the wrong solution. A homeowner who buys three sets of bulbs chasing a flicker has often spent more than a service call would have cost, and the underlying cause may still be sitting in the panel. Our technicians carry the meters and testers needed to distinguish a compatibility issue from a loose neutral or an overloaded circuit. That distinction matters, because one is an inconvenience and the other is a hazard. We tell you plainly which one you have and what it will take to fix it.
Planning a Whole Home Smart Lighting and Dimmer Switch Upgrade
The most successful smart lighting projects start with a walkthrough rather than a shopping cart. We look at how each room is actually used, where the switch locations are, what the existing circuits can support, and which fixtures are worth keeping. From there we build a device list that stays within a single ecosystem, so every control in the house talks to every other one. Phasing the work by room or by floor keeps the budget manageable while maintaining compatibility across the whole system. Homeowners who plan this way avoid the common trap of three brands and two apps competing for the same house.
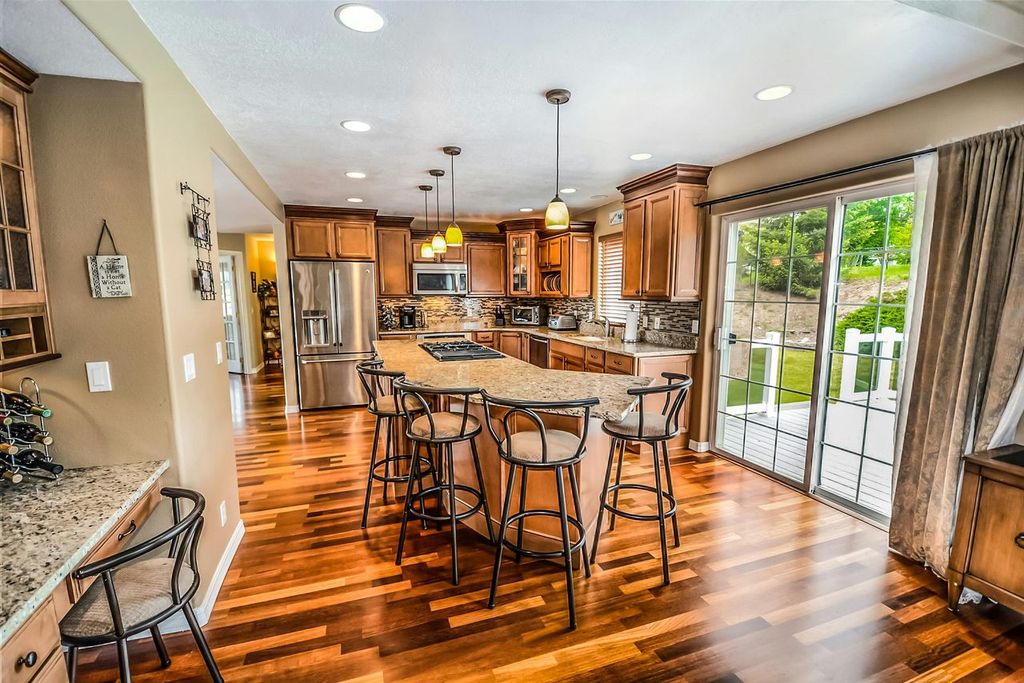
Fixture selection and control selection belong in the same conversation, since one determines the other. Recessed cans, undercabinet tape, pendant fixtures, and landscape lighting each carry different dimming requirements, and specifying them together prevents mismatches. Outdoor lighting adds photocell and astronomical timer functions that pair naturally with smart controls for security and curb appeal as the evenings get darker. Kitchens and living rooms benefit most from layered lighting with separate controls for task, ambient, and accent circuits. Getting the circuiting right during planning is far cheaper than adding circuits after the walls are closed.
Electrical capacity is the last piece, and it is worth confirming before the project grows. A lighting upgrade rarely strains a service by itself, but homeowners often combine it with a kitchen remodel, an added circuit for a home office, or a garage upgrade in the same season. If your panel is already full or your service is undersized for what you are planning, that is much better to know at the start. We evaluate panel capacity, available breaker spaces, and existing circuit loading as part of the planning process. Then we give you a straightforward path forward with clear pricing.
Why Choose Edinson Electrical Solutions for Smart Lighting and Dimmer Switches
Edinson Electrical Solutions is a family owned and operated local business, licensed and insured in the Commonwealth of Pennsylvania, serving homeowners throughout the Lehigh Valley from our shop at 3049 Birch St in Hokendauqua. We built this company on code compliant work designed for long term reliability, not quick fixes that look fine until the first cold snap. Every job we complete carries our lifetime craftsmanship warranty, which reflects real confidence in how our technicians terminate, test, and document their work. We show up when we say we will, we clean up before we leave, and we explain what we found in plain language. That is what earning a five star service reputation actually takes.
We also understand that a whole home lighting upgrade is a real investment, which is why financing is available through Synchrony for qualified homeowners. Spreading the cost of a project lets you do the job properly the first time instead of cutting corners on device quality or scope. Our estimates are itemized and clear, so you know exactly what you are paying for before any work begins. There are no surprise additions at the end of the job. We would rather have your trust than a single oversized invoice.
Call us at (484) 898-7788 or email info@edinsonelectrical.com to schedule an evaluation of your lighting and switch locations. We serve Allentown, Bethlehem, Easton, Whitehall, Emmaus, Macungie, Nazareth, Bath, Hellertown, Coopersburg, Quakertown, Kutztown, Bangor, Slatington, Palmerton, Lehighton, and Hokendauqua. Fall is the right season to handle this work, before the darkest weeks of the year arrive and holiday schedules fill up. Our technicians will walk your home, identify what your existing wiring supports, and recommend a system that will still be working well a decade from now. Reach out today and we will get you on the schedule.